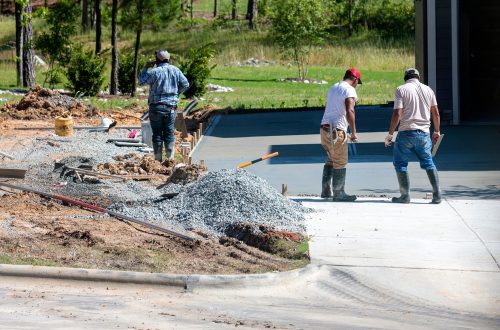
You might think that pouring concrete slabs is a job only construction personnel can do. However, if you have basic masonry skills, you can execute them yourself. The only challenge is to pour in the concrete slab perfectly. Here are the essential steps how:
1.Plan In Advance Where to Pour The Concrete
If you have done several masonry projects, you already understand how planning can help increase the work’s efficiency. Not only do you have to plan where the materials will be situated, but you also need to consider the weather. Therefore, make sure that the weather is right before you begin the execution. Also, have plans in case of sudden rainfall. Here you can find the best construction company.
2.Calculate Your Orders Accordingly
Once you have planned for your project, you now need to calculate the concrete needed for your concrete slab. Here is a suggested formula for calculating the needed amount of concrete: Length (in feet) x Width (in feet) x depth (in feet).
The total output is in cubic feet. However, if the concrete orders are to be converted into cubic yards, just divide the output by ‘27’. To avoid running short of concrete on the actual pouring, make sure to add at least a foot of allowance in all of the dimensions.
When you make orders with concrete contractors, make sure that the time of delivery coincides with the schedule you have planned. If you have established an agreement, see to it that majority of the payment will be given after the delivery. Also, don’t forget to call in advance, at least a week prior, for confirmation and reassurance.
3.Prepare the Tools Necessary for Pouring The Slab
You will need the right tools in order to perfectly execute the pouring of the concrete slab. If you don’t have them, you can rent or borrow the tools from a friend. Here are some necessary tools:
- Straightedge or Screed
- Bull Float
- Concrete Rakes
- Mag-Float
4.Prepare Before the Cement Truck Arrives
Before the concrete truck arrives on site, see to it that your string line is tight enough and your forms are leveled. Also, make sure your tools and mindset are prepared. If you employ a few helpers, ensure that they are well-oriented about your plans and can be easily managed. When the truck arrives, you have to direct it to avoid causing traffic or disturbance in the neighborhood.
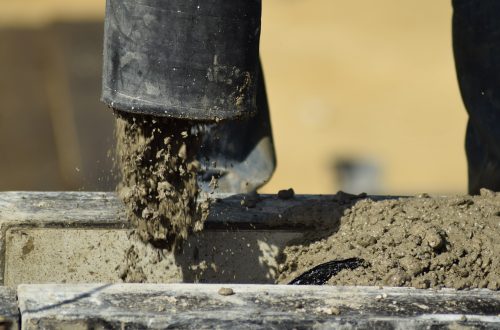
5.Know Where And How to Pour the Concrete Sequentially
If this is your first time taking such a large task, it is important to know what to do when the concrete truck arrives. Basically, ask the truck driver to drive back in so as to start pouring the concrete from the back of the slab working towards the front.
Spread it by moving back and forth the chute. Don’t fill the giant sections to prevent accumulating extra concrete that hinders the screed board from moving easily. As you pull towards the front, you have to slide your screed board back and forth also.
It is preferable to have a slight ‘crown’ in the screed board in order to create a hump in the middle to drain the water. Just make sure that the crown is facing up. Push the surface rocks deeper in the concrete mix.
Use a bull float to help level the slab and let it float, perpendicular to your direction, right after screeding a portion. The next step is to mag-float the edges to smoothen out the concrete. While you are straightening the surface, try not to over-trowel the concrete foundation.
6. Add Finishing Touches Before the Concrete Dries Up
If you are edging, make sure the concrete is firm. Once the concrete dries up, it will shrink in volume and that can cause cracks. To contain such a situation, you have to cut the control joints, about 1/4 of the concrete’s depth, to make individual sections.
If the surface seems too shiny enough, create traction using a broom. Just ensure that the resulting surface has enough roughness for friction. The concrete can also get weaker as it evaporates faster than the chemical curing process. One solution for that is to spray the concrete foundation with ample water almost every day.
Conclusion
As you finish a day’s work, always clean your tools and equipment. Keep observing your concrete slab from time to time for any unwanted or concerning situations. Make the pouring as perfect as possible since it will be very costly and time-consuming if there will be a back job.